No products in the cart.
19 Simple Weekday Dinner Recipes Using Dairy Free
You can whip up tasty dinners without dairy, and it’s easier than you think! Try a creamy coconut curry, dairy-free spinach pasta, or zesty lemon quinoa salad. Each recipe is packed with nutrients and bursting with flavor, making them perfect for busy weekdays. Feeling adventurous? How about some vegan tacos loaded with beans and avocado? These meals are not just quick to prepare; they’re also customizable to fit your taste buds. So, why not explore these delightful options? You’ll be surprised at how simple and satisfying dairy-free dinners can be, leaving you enthusiastic to discover more delightful recipes!
Contents
hide
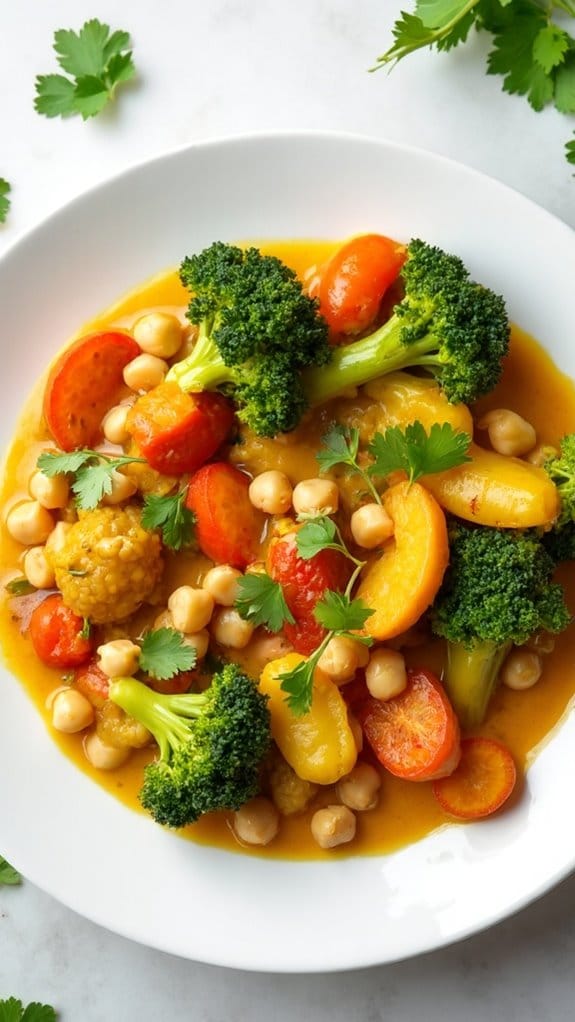
Creamy Coconut Curry
Title: Creamy Coconut Curry
Prep Time: 15 minutes
Cook Time: 30 minutes
Number of Servings: 4
Required Equipment List: Large pot, wooden spoon, measuring cups, knife, cutting board
Cuisine Type: Asian-inspired
Creamy Coconut Curry is a rich and flavorful dish that brings together the delightful tastes of coconut milk, fresh vegetables, and aromatic spices. This dish isn’t only dairy-free but also packed with nutrients, making it an excellent choice for a wholesome family meal.
The creaminess of the coconut milk balances beautifully with the warmth of spices, creating a comforting curry that can be served with rice or quinoa for a complete meal. This versatile recipe allows for a variety of vegetables and protein options, making it easy to customize based on what you have on hand or your personal preferences.
Whether you choose to add chickpeas, tofu, or your favorite seasonal vegetables, this curry is sure to become a staple in your home. Serve it hot, garnished with fresh cilantro, and enjoy a taste of the tropics right on your dinner table.
Ingredients:
- 1 tablespoon coconut oil
- 1 onion, diced
- 2 cloves garlic, minced
- 1 tablespoon fresh ginger, minced
- 1 tablespoon curry powder
- 1 teaspoon turmeric
- 1 can (14 oz) coconut milk
- 1 cup vegetable broth
- 2 cups mixed vegetables (bell peppers, carrots, broccoli)
- 1 can (15 oz) chickpeas, drained and rinsed
- Salt and pepper to taste
- Fresh cilantro, for garnish
Instructions:
- In a large pot, heat the coconut oil over medium heat. Once melted, add the diced onion and sauté until translucent, about 5 minutes. Stir in the minced garlic and ginger, cooking for an additional minute until fragrant.
- Add the curry powder and turmeric to the pot, stirring well to coat the onions. Cook the spices for about 1-2 minutes to release their full flavor, making sure not to let them burn.
- Pour in the coconut milk and vegetable broth, stirring until combined. Bring the mixture to a gentle simmer, allowing it to bubble lightly as you prepare the vegetables.
- Add the mixed vegetables and chickpeas to the pot, stirring to ascertain everything is evenly distributed. Cover the pot and let the curry simmer for about 15-20 minutes, or until the vegetables are tender.
- Once the vegetables are cooked, taste the curry and season with salt and pepper as needed. If you prefer a thicker consistency, let it simmer uncovered for a few additional minutes to reduce the liquid.
- Serve the creamy coconut curry hot, garnished with fresh cilantro. Pair it with rice or quinoa for a hearty meal and enjoy the vibrant flavors.
Extra Tips: For a spicy kick, consider adding some red pepper flakes or diced chilies when cooking the onions. You can also make this dish ahead of time and store it in the fridge, as the flavors develop even more after a day.
Feel free to experiment with different vegetables based on your preferences or what’s in season, and don’t hesitate to add a splash of lime juice before serving for an extra layer of brightness.
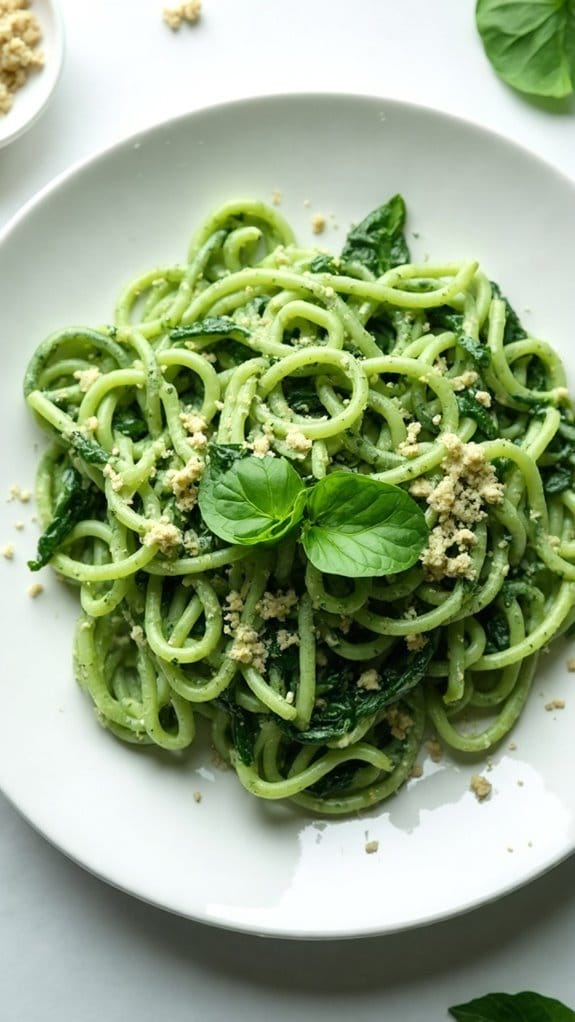
Dairy-Free Spinach Pasta
Title: Dairy-Free Spinach Pasta
Prep Time: 10 minutes
Cook Time: 15 minutes
Number of Servings: 4
Required Equipment List: Large pot, colander, skillet, spatula, measuring cups, measuring spoons
Cuisine Type: Italian
This Dairy-Free Spinach Pasta is a vibrant and nutritious dish that brings the goodness of fresh spinach to your dinner table. The recipe features a smooth, creamy sauce made from cashews and nutritional yeast, which mimics the richness of traditional dairy-based sauces without any of the lactose.
With a simple preparation and a short cooking time, this dish is perfect for busy weeknights when you want a wholesome meal that’s both satisfying and delicious. The combination of sautéed garlic, fresh spinach, and the creamy cashew sauce creates a delightful flavor that will please even non-vegan diners.
Served over your choice of pasta, it’s not only beautiful but also packed with nutrients, making it a wholesome choice for families. This versatile recipe can easily be customized by adding vegetables or proteins of your choice, allowing you to make it your own.
Ingredients:
- 8 ounces pasta of your choice (gluten-free if desired)
- 1 cup raw cashews, soaked for at least 2 hours
- 2 cups fresh spinach
- 2 cloves garlic, minced
- 1 tablespoon nutritional yeast
- 1 teaspoon lemon juice
- Salt and pepper to taste
- Olive oil for sautéing
- Fresh basil for garnish (optional)
Instructions:
- Begin by cooking the pasta according to package instructions in a large pot of salted boiling water. Once al dente, reserve 1 cup of the pasta water, then drain the pasta in a colander and set aside.
- In a blender or food processor, combine the soaked cashews, nutritional yeast, lemon juice, and a pinch of salt and pepper. Blend until smooth and creamy, adding reserved pasta water as needed to achieve your desired sauce consistency.
- In a large skillet, heat a splash of olive oil over medium heat. Add the minced garlic and sauté for about 1 minute until fragrant, being careful not to let it burn.
- Add the fresh spinach to the skillet and cook for 2-3 minutes until wilted. Stir in the prepared cashew sauce, mixing well to combine all the flavors. If the sauce is too thick, add more of the reserved pasta water to loosen it.
- Toss the cooked pasta into the skillet with the spinach and sauce, ensuring that the pasta is well coated. Cook for an additional 2 minutes over low heat to warm through, then taste and adjust seasoning with more salt and pepper if needed.
- Serve the pasta warm, garnished with fresh basil if desired. Enjoy your dairy-free creation!
Extra Tips: For added flavor, consider incorporating other vegetables like cherry tomatoes or bell peppers into the sautéed spinach. You can also experiment with different herbs such as oregano or thyme to enhance the sauce.
If you prefer a bit of heat, a pinch of red pepper flakes can be added when sautéing the garlic. This dish pairs beautifully with a light salad or steamed vegetables for a complete meal.
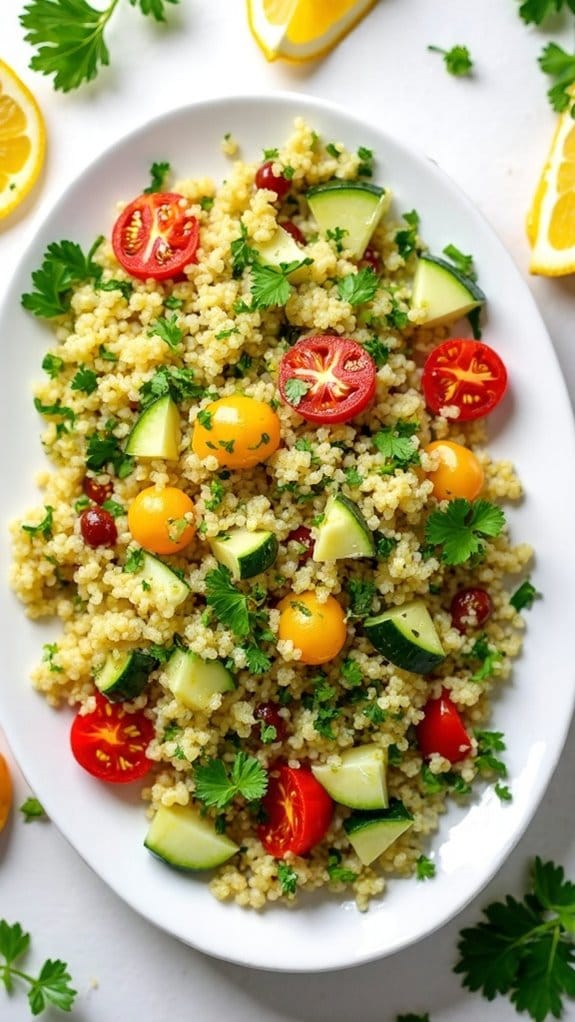
Zesty Lemon Quinoa Salad
Title: Zesty Lemon Quinoa Salad
Prep Time: 15 minutes
Cook Time: 15 minutes
Number of Servings: 4
Required Equipment List: Medium saucepan, mixing bowl, whisk, fork, measuring cups, measuring spoons
Cuisine Type: Mediterranean
This Zesty Lemon Quinoa Salad is a revitalizing and nutritious dish that combines the wholesome goodness of quinoa with vibrant flavors of lemon and fresh vegetables. It’s perfect for a light dinner or as a side dish at gatherings.
The salad isn’t only dairy-free but also packed with protein and fiber, making it a filling option that everyone can enjoy. The zesty lemon dressing adds a bright and tangy element that complements the earthy flavor of quinoa beautifully.
With its colorful ingredients, including crisp cucumbers, juicy tomatoes, and fragrant parsley, this salad is as visually appealing as it’s delicious. Additionally, it’s incredibly versatile, allowing you to incorporate seasonal vegetables or even add some chickpeas for extra protein.
This dish can be made ahead of time and served chilled, making it an ideal choice for meal prep or picnics.
Ingredients:
- 1 cup quinoa
- 2 cups water
- 1 medium cucumber, diced
- 1 cup cherry tomatoes, halved
- 1/4 cup red onion, finely chopped
- 1/4 cup fresh parsley, chopped
- Zest and juice of 1 lemon
- 2 tablespoons olive oil
- Salt and pepper to taste
Instructions:
- Begin by rinsing the quinoa under cold water in a fine-mesh strainer to remove any bitterness. In a medium saucepan, combine the rinsed quinoa and water, then bring to a boil over medium-high heat.
- Once boiling, reduce the heat to low, cover the saucepan, and let it simmer for about 15 minutes, or until the quinoa is tender and the water is absorbed. Remove from heat and let it sit for 5 minutes, then fluff with a fork and allow it to cool.
- In a mixing bowl, combine the diced cucumber, halved cherry tomatoes, chopped red onion, and parsley. These fresh ingredients will provide a burst of flavor and color to the salad.
- In a small bowl, whisk together the lemon zest, lemon juice, olive oil, salt, and pepper until well combined. This dressing will add a zesty punch to the salad.
- Once the quinoa has cooled, add it to the bowl with the chopped vegetables. Pour the lemon dressing over the salad and gently toss everything together until well combined. Adjust seasoning if necessary.
- Serve the salad immediately or refrigerate it for an hour to allow the flavors to meld. This salad can be stored in an airtight container in the refrigerator for up to three days.
Extra Tips:
To enhance the flavor of the quinoa, consider toasting it in the saucepan for a few minutes before adding the water. You can also customize this salad by adding other ingredients such as bell peppers, olives, or feta cheese (if not strictly dairy-free).
For a more filling meal, serve the salad over a bed of greens or alongside grilled chicken or shrimp. Enjoy the light and revitalizing flavors of this Zesty Lemon Quinoa Salad!
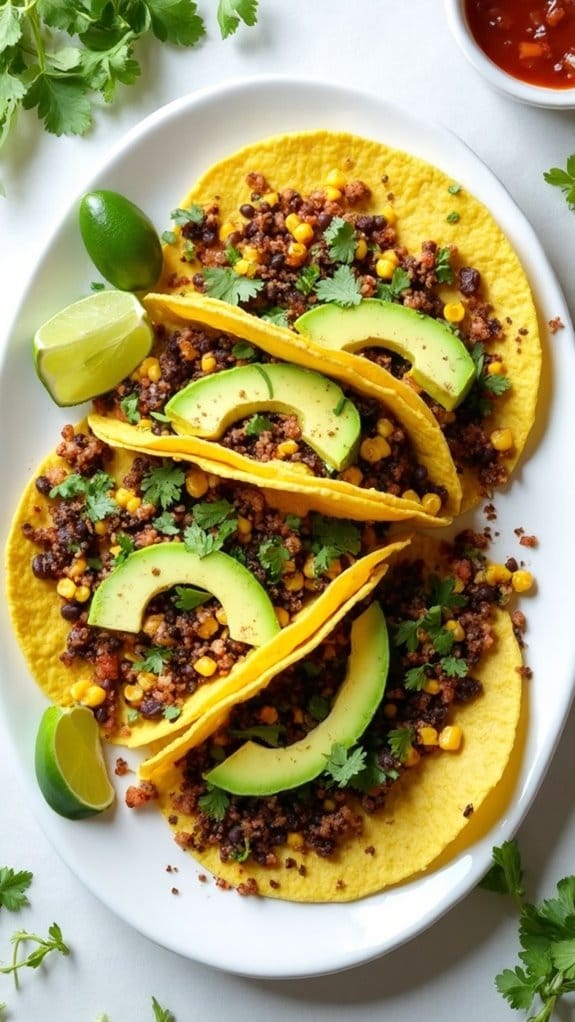
Vegan Tacos with Avocado
Title: Vegan Tacos with Avocado
Prep Time: 15 minutes
Cook Time: 10 minutes
Number of Servings: 4
Required Equipment List: Skillet, cutting board, knife, mixing bowl, spoon, taco shells
Cuisine Type: Mexican-inspired
These Vegan Tacos with Avocado are a fresh and flavorful option for anyone looking to enjoy a hearty meal without animal products. Packed with vibrant vegetables and a creamy avocado filling, these tacos aren’t only delicious but also nutritious. The combination of sautéed black beans, corn, and spices creates a satisfying mix that pairs perfectly with the smooth texture of ripe avocado and zesty lime juice.
Ideal for a quick weeknight dinner or a casual gathering, these tacos are sure to be a hit. What makes these tacos truly special is the simplicity of the ingredients that come together to create a delightful explosion of flavors. They’re customizable, allowing you to adjust the toppings to your liking, whether it’s adding fresh cilantro, diced tomatoes, or a sprinkle of nutritional yeast for a cheesy flavor.
Serve these tacos with your favorite salsa or hot sauce for an extra kick, making them a versatile meal for any occasion.
Ingredients:
- 1 can black beans, rinsed and drained
- 1 cup corn kernels (fresh or frozen)
- 1 teaspoon chili powder
- 1/2 teaspoon cumin
- Salt and pepper to taste
- 1 ripe avocado, diced
- Juice of 1 lime
- 8 taco shells
- Fresh cilantro, chopped (for garnish)
- Salsa or hot sauce (optional for serving)
Instructions:
- In a skillet over medium heat, combine the black beans, corn, chili powder, cumin, salt, and pepper. Cook for about 5-7 minutes, stirring occasionally, until the mixture is heated through and fragrant.
- While the bean mixture is cooking, prepare the avocado by dicing it and placing it in a mixing bowl. Squeeze the lime juice over the avocado and gently toss to coat. This will help to prevent browning and add a revitalizing flavor.
- Once the bean mixture is ready, remove it from the heat. Warm the taco shells in the oven according to the package instructions or in the skillet for a minute or two until they’re crispy.
- To assemble the tacos, place a generous spoonful of the bean and corn mixture into each taco shell. Top with the lime-dressed avocado and any additional toppings you desire, such as chopped cilantro or salsa.
- Serve the tacos immediately while they’re warm, with extra lime wedges and hot sauce on the side for those who want to add a little spice.
Extra Tips: To enhance the flavor of the filling, consider adding diced onions and bell peppers to the skillet while cooking the bean mixture. You can also experiment with different types of beans, such as pinto or kidney beans, for added texture.
If you’re looking to make these tacos even heartier, feel free to add quinoa or brown rice as a base layer in the taco shells. Enjoy customizing your tacos for a fun and delicious meal!
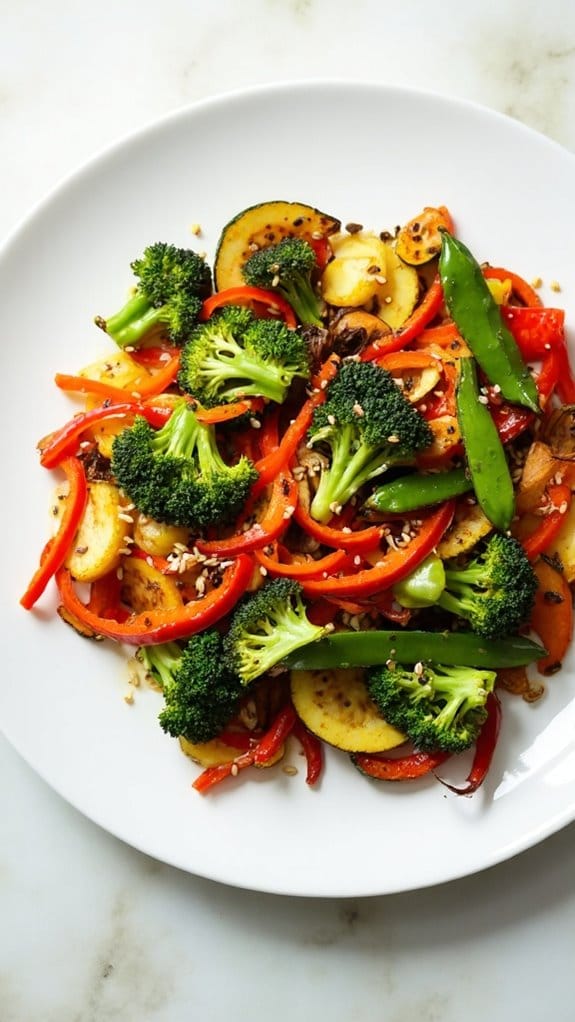
Roasted Vegetable Stir-Fry
Title: Roasted Vegetable Stir-Fry
Prep Time: 15 minutes
Cook Time: 20 minutes
Number of Servings: 4
Required Equipment List: Large skillet or wok, cutting board, knife, spatula, measuring cups and spoons
Cuisine Type: Asian-inspired
This Roasted Vegetable Stir-Fry is a vibrant and healthy dish that’s perfect for a quick weeknight dinner. Packed with a variety of colorful vegetables, this stir-fry not only looks appealing but also provides a spectrum of flavors and nutritional benefits.
The roasting process enhances the natural sweetness of the vegetables, while the stir-frying adds a delightful crunch. It’s an excellent way to enjoy seasonal produce and can be easily customized based on your preferences.
The beauty of this recipe lies in its versatility; you can mix and match your favorite vegetables and adjust the sauce to suit your taste. Serve it over rice, quinoa, or noodles for a complete meal. This dish isn’t only dairy-free but also vegan-friendly, making it a great option for anyone looking to incorporate more plant-based meals into their diet.
Ingredients:
- 2 cups broccoli florets
- 1 bell pepper, sliced
- 1 cup snap peas
- 1 carrot, julienned
- 1 zucchini, sliced
- 3 tablespoons olive oil
- 2 tablespoons soy sauce (or tamari for gluten-free)
- 1 tablespoon sesame oil
- 1 teaspoon minced garlic
- 1 teaspoon grated ginger
- Salt and pepper to taste
- Sesame seeds for garnish (optional)
Instructions:
- Preheat your oven to 425°F (220°C). Line a baking sheet with parchment paper to make for easy cleanup. While the oven is heating, prepare the vegetables by washing and cutting them into bite-sized pieces.
- In a large mixing bowl, combine the chopped broccoli, bell pepper, snap peas, carrot, and zucchini. Drizzle with olive oil and season with salt and pepper. Toss the vegetables until they’re evenly coated with oil and seasoning.
- Spread the vegetables in a single layer on the prepared baking sheet. Roast in the preheated oven for about 15 minutes, or until they’re tender and slightly caramelized. Stir halfway through to guarantee even roasting.
- While the vegetables are roasting, prepare the stir-fry sauce. In a small bowl, whisk together the soy sauce, sesame oil, minced garlic, and grated ginger until well combined. Set aside.
- Once the vegetables are done roasting, remove them from the oven and transfer them to a large skillet or wok over medium-high heat. Pour the stir-fry sauce over the vegetables and toss to combine, cooking for an additional 2-3 minutes to heat through.
- Serve the roasted vegetable stir-fry warm, garnished with sesame seeds if desired. Enjoy it on its own or over a bed of rice, quinoa, or noodles for a complete meal.
Extra Tips: To enhance the flavors of your stir-fry, consider adding a splash of rice vinegar or a squeeze of fresh lime juice just before serving. You can also include protein options like tofu, chickpeas, or tempeh to make the dish more filling.
Feel free to experiment with different vegetables based on what you have on hand; just keep in mind that cooking times may vary for harder vegetables like carrots and bell peppers. Enjoy creating your own delicious variations!
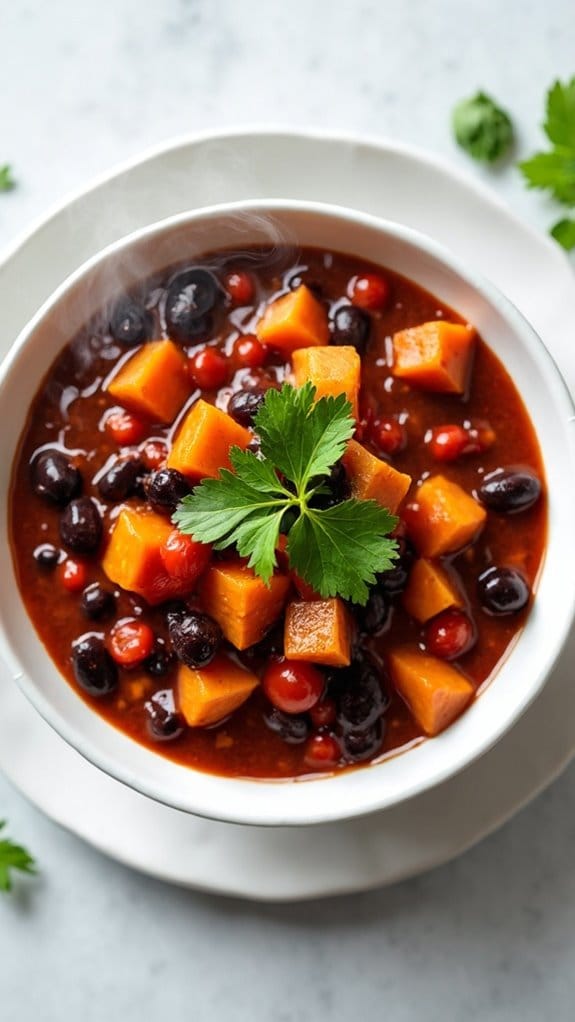
Sweet Potato and Black Bean Chili
Title: Sweet Potato and Black Bean Chili
Prep Time: 15 minutes
Cook Time: 30 minutes
Number of Servings: 6
Required Equipment List: Large pot, cutting board, knife, measuring cups, stirring spoon
Cuisine Type: Mexican-inspired
This Sweet Potato and Black Bean Chili is a hearty and nutritious dish that bursts with flavor and color. Packed with protein-rich black beans and sweet potatoes, this chili isn’t only comforting but also incredibly satisfying.
The combination of spices, tomatoes, and vegetables creates a deliciously complex flavor profile that’s sure to please everyone at the table. It’s perfect for a cozy night in or for feeding a crowd during game day.
This vegan chili is easy to prepare and can be made in one pot, making cleanup a breeze. It’s an excellent option for meal prep since it stores well and tastes even better the next day.
Whether you’re a chili aficionado or trying it for the first time, this Sweet Potato and Black Bean Chili will be a delightful addition to your dinner rotation.
Ingredients:
- 2 medium sweet potatoes, diced
- 1 can (15 oz) black beans, drained and rinsed
- 1 can (14 oz) diced tomatoes
- 1 cup vegetable broth
- 1 onion, diced
- 3 cloves garlic, minced
- 1 tablespoon chili powder
- 1 teaspoon cumin
- 1 teaspoon smoked paprika
- Salt and pepper to taste
- 1 tablespoon olive oil
- Fresh cilantro for garnish (optional)
Instructions:
- Begin by heating the olive oil in a large pot over medium heat. Once hot, add the diced onion and sauté for about 5 minutes, or until the onion becomes translucent. This step enhances the flavor base of your chili.
- Add the minced garlic to the pot and cook for another minute, stirring frequently to avoid burning. The aroma of the garlic will add an additional layer of flavor to your chili.
- Stir in the diced sweet potatoes, chili powder, cumin, smoked paprika, salt, and pepper. Mix well to guarantee the sweet potatoes are coated with the spices and cook for about 5 minutes, allowing them to soften slightly.
- Pour in the diced tomatoes and vegetable broth, then add the rinsed black beans. Stir everything together, bring the mixture to a simmer, and cover the pot. Let it cook for about 20 minutes, or until the sweet potatoes are tender.
- Once cooked, taste the chili and adjust the seasoning as needed. If you prefer a thinner chili, you can add a bit more vegetable broth. Serve hot, garnished with fresh cilantro if desired.
Extra Tips: For added depth of flavor, consider adding a splash of lime juice before serving, which brightens the dish and enhances the sweetness of the potatoes.
This chili can also be customized by adding other vegetables like bell peppers or corn. If you like it spicy, feel free to toss in some diced jalapeños or a pinch of cayenne pepper.
Leftovers are excellent for lunch the next day and can be frozen for future meals. Enjoy your delicious and healthy creation!
Garlic Herb Chicken Skewers

Title: Garlic Herb Chicken Skewers
Prep Time: 15 minutes
Cook Time: 10 minutes
Number of Servings: 4
Required Equipment List: Skewers, mixing bowl, grill or grill pan, basting brush
Cuisine Type: Mediterranean
Garlic Herb Chicken Skewers are a delicious and easy-to-make dish that brings together the robust flavors of garlic and fresh herbs, perfect for a weeknight dinner or a weekend barbecue. Marinated in a mixture of olive oil, garlic, lemon juice, and a medley of herbs, the chicken becomes tender and flavorful, while grilling adds a delightful char.
These skewers aren’t only visually appealing but also packed with protein, making them a satisfying meal option. This recipe is incredibly versatile; you can easily customize the vegetables added to the skewers, such as bell peppers, zucchini, or cherry tomatoes. Serve them with a side of rice, salad, or a dairy-free dip to round out the meal.
Whether you’re hosting a gathering or simply cooking for family, these Garlic Herb Chicken Skewers are sure to impress with their vibrant flavors and ease of preparation.
Ingredients:
- 1 pound boneless, skinless chicken breasts, cut into 1-inch cubes
- 1/4 cup olive oil
- 4 cloves garlic, minced
- Juice of 1 lemon
- 1 tablespoon fresh rosemary, chopped
- 1 tablespoon fresh thyme, chopped
- 1 teaspoon salt
- 1/2 teaspoon black pepper
- Skewers (wooden or metal)
Instructions:
- In a mixing bowl, combine the olive oil, minced garlic, lemon juice, chopped rosemary, chopped thyme, salt, and black pepper. Whisk together until well combined to create the marinade.
- Add the cubed chicken to the marinade, ensuring all pieces are well coated. Cover the bowl with plastic wrap and let it marinate in the refrigerator for at least 30 minutes, or up to 2 hours for enhanced flavor.
- Preheat your grill or grill pan over medium-high heat. If using wooden skewers, soak them in water for 15-20 minutes to prevent burning during cooking.
- Thread the marinated chicken onto the skewers, leaving a little space between each piece for even cooking. If desired, alternate with your choice of vegetables such as bell peppers or zucchini.
- Place the skewers on the grill and cook for about 5-7 minutes on each side, or until the chicken is cooked through and has nice grill marks. The internal temperature should reach 165°F (75°C).
- Once cooked, remove the skewers from the grill and let them rest for a few minutes before serving. This allows the juices to redistribute, ensuring the chicken remains moist.
Extra Tips: For an extra layer of flavor, consider adding a teaspoon of smoked paprika to the marinade. You can also experiment with different herbs according to your taste preferences, such as oregano or basil.
These skewers can be served hot off the grill or at room temperature, making them a great option for meal prep or picnics. Enjoy with a side of your favorite dipping sauce or a revitalizing salad!
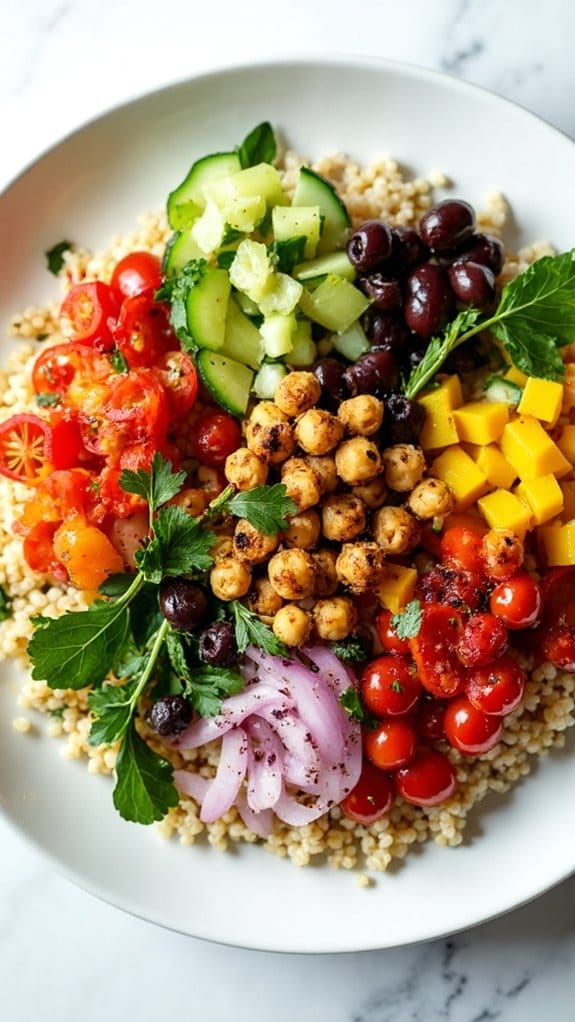
Mediterranean Chickpea Bowl
Title: Mediterranean Chickpea Bowl
Prep Time: 15 minutes
Cook Time: 20 minutes
Number of Servings: 4
Required Equipment List: Medium saucepan, mixing bowl, baking sheet, sharp knife, cutting board
Cuisine Type: Mediterranean
The Mediterranean Chickpea Bowl is a vibrant and nutritious dish that brings together the fresh flavors of the Mediterranean in a quick and easy meal. Packed with protein from chickpeas and colorful vegetables, this bowl is perfect for a satisfying lunch or dinner.
The combination of lemon, garlic, and olive oil creates a bright dressing that ties all the ingredients together, making each bite a delightful experience. This dish isn’t only delicious but also highly customizable, allowing you to add your favorite toppings or adjust the flavors to your liking.
This recipe showcases the versatility of chickpeas, which can be roasted for added crunch or simply tossed with fresh vegetables and grains. Served over a bed of quinoa or brown rice, it’s a wholesome choice that’s both filling and energizing.
With minimal prep and cook time, the Mediterranean Chickpea Bowl is ideal for busy weeknights or meal prep, ensuring you have a healthy option ready to go.
Ingredients:
- 1 can (15 oz) chickpeas, drained and rinsed
- 1 cup cooked quinoa or brown rice
- 1 cup cherry tomatoes, halved
- 1 cucumber, diced
- 1 bell pepper, diced
- 1/4 red onion, thinly sliced
- 1/4 cup Kalamata olives, pitted and sliced
- 1/4 cup fresh parsley, chopped
- 3 tablespoons olive oil
- Juice of 1 lemon
- 2 cloves garlic, minced
- Salt and pepper to taste
Instructions:
- Preheat your oven to 400°F (200°C). Spread the drained and rinsed chickpeas on a baking sheet. Drizzle with a tablespoon of olive oil and season with salt and pepper. Roast in the oven for about 15-20 minutes until they’re golden and crispy, shaking the pan halfway through for even cooking.
- While the chickpeas are roasting, prepare the dressing by whisking together the remaining olive oil, lemon juice, minced garlic, salt, and pepper in a small bowl. Adjust seasoning to taste and set aside.
- In a large mixing bowl, combine the cooked quinoa or brown rice, cherry tomatoes, cucumber, bell pepper, red onion, olives, and parsley. Gently toss the ingredients together to mix them evenly.
- Once the chickpeas are done roasting, remove them from the oven and let them cool slightly. Add the roasted chickpeas to the mixing bowl with the vegetables and grains. Drizzle the dressing over the top and toss to combine all the ingredients well.
- Serve the Mediterranean Chickpea Bowl warm or at room temperature, garnished with extra parsley or a wedge of lemon if desired.
Extra Tips: For added flavor, consider marinating the chickpeas in the dressing for at least 30 minutes before roasting. You can also add feta cheese or avocado for creaminess or incorporate seasonal vegetables like zucchini or spinach.
This bowl is perfect for meal prep; just keep the dressing separate until you’re ready to eat to maintain freshness. Enjoy this nutritious and flavorful dish!
Thai Peanut Noodle Salad
Title: Thai Peanut Noodle Salad
Prep Time: 15 minutes
Cook Time: 10 minutes
Number of Servings: 4
Required Equipment List: Large pot, colander, mixing bowl, whisk, serving bowl
Cuisine Type: Thai-inspired
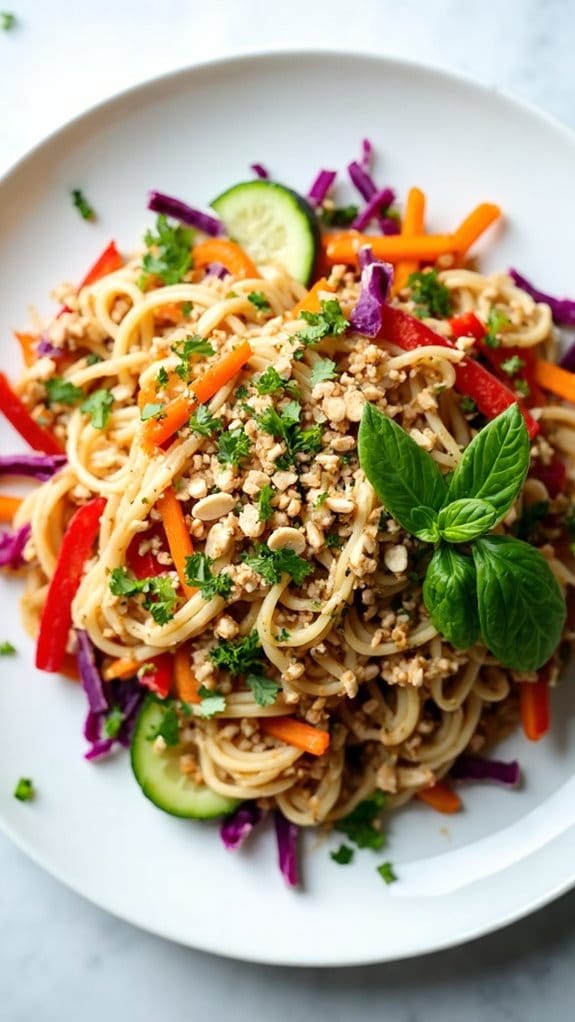
This Thai Peanut Noodle Salad is a vibrant and invigorating dish that brings the flavors of Thailand right to your table. Featuring rice noodles tossed with crunchy vegetables and a creamy peanut dressing, this salad is both satisfying and nutritious. The combination of fresh ingredients and a delightful dressing makes it a perfect choice for a light dinner or a hearty lunch.
The beauty of this salad lies in its versatility; you can easily add proteins like grilled chicken or tofu to make it even more filling. The peanut sauce, made from natural peanut butter, soy sauce, and lime juice, adds a rich and tangy flavor that perfectly complements the fresh veggies. This dish isn’t only quick to prepare but also a great option for meal prep, as it can be enjoyed cold or at room temperature.
Ingredients:
- 8 ounces rice noodles
- 1 cup red bell pepper, thinly sliced
- 1 cup carrots, julienned
- 1 cup cucumber, sliced
- 1 cup red cabbage, shredded
- 1/4 cup green onions, chopped
- 1/4 cup cilantro, chopped
- 1/2 cup natural peanut butter
- 3 tablespoons soy sauce (or tamari for gluten-free)
- 2 tablespoons lime juice
- 1 tablespoon maple syrup (or honey)
- 1 teaspoon sesame oil
- 1/4 teaspoon crushed red pepper flakes (optional)
- Chopped peanuts for garnish
Instructions:
- Begin by cooking the rice noodles according to the package instructions. Typically, this involves boiling them in a large pot of water for about 5-7 minutes until they’re tender. Once cooked, drain the noodles in a colander and rinse them under cold water to stop the cooking process and prevent sticking.
- In a mixing bowl, prepare the peanut dressing by whisking together the peanut butter, soy sauce, lime juice, maple syrup, sesame oil, and crushed red pepper flakes if using. Mix until smooth and well combined. Adjust the consistency of the dressing by adding a little water if it’s too thick.
- In a large serving bowl, combine the cooked rice noodles with the sliced red bell pepper, julienned carrots, cucumber, shredded red cabbage, chopped green onions, and cilantro. Toss the ingredients together gently to guarantee they’re evenly mixed.
- Pour the peanut dressing over the noodle and vegetable mixture. Toss everything together until the noodles and vegetables are well coated in the dressing. Taste and adjust seasoning if necessary, adding more lime juice or soy sauce to your liking.
- Serve the salad immediately, garnished with chopped peanuts for added crunch and flavor. If not serving right away, you can refrigerate the salad (without the peanuts) for up to a day. Just add the peanuts before serving to keep them crunchy.
Extra Tips: For a protein boost, consider adding grilled chicken, shrimp, or tofu to the salad. You can also customize the vegetables based on what you have on hand; snap peas, bok choy, or edamame work beautifully. If you’re a fan of heat, feel free to increase the amount of crushed red pepper flakes in the dressing or serve with sliced fresh chili on the side. Enjoy this salad as an invigorating main dish or as a vibrant side at your next gathering!
Cauliflower Rice Stir-Fry
Title: Cauliflower Rice Stir-Fry
Prep Time: 10 minutes
Cook Time: 15 minutes
Number of Servings: 4
Required Equipment List: Large skillet or wok, spatula, knife, cutting board
Cuisine Type: Asian-inspired
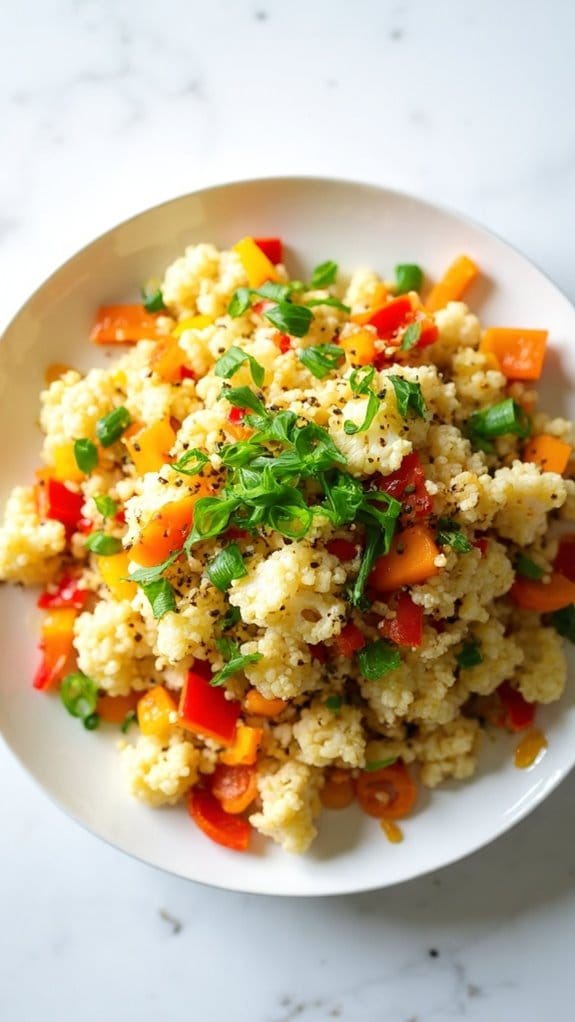
Cauliflower Rice Stir-Fry is a vibrant and healthy dish that serves as a perfect alternative to traditional fried rice, making it an excellent choice for those seeking a low-carb, dairy-free meal. This dish showcases the versatility of cauliflower rice, which absorbs flavors beautifully while providing a satisfying texture. Packed with colorful vegetables and your choice of protein, it’s a wholesome option for a quick weeknight dinner or a meal prep staple.
The beauty of this stir-fry lies in its adaptability; you can easily customize it by using your favorite vegetables and proteins. Whether you’re incorporating tofu, chicken, or shrimp, the stir-fry is cooked at high heat to achieve that authentic “wok hei” (breath of the wok) flavor. In about 25 minutes, you can whip up a delicious, nutritious meal that will satisfy your craving for takeout while keeping your dietary preferences in mind.
Ingredients:
- 1 head cauliflower, riced (about 4 cups)
- 2 tablespoons vegetable oil
- 1 cup bell pepper, diced
- 1 cup carrots, julienned
- 1 cup snap peas, trimmed
- 3 green onions, sliced
- 2 cloves garlic, minced
- 1 tablespoon fresh ginger, minced
- 3 tablespoons soy sauce or tamari
- 1 tablespoon sesame oil
- Salt and pepper to taste
Instructions:
- Begin by preparing the cauliflower rice. Remove the leaves and stem from the cauliflower, then cut it into florets. Using a food processor, pulse the florets until they reach a rice-like consistency. You can also grate the cauliflower using a box grater if you don’t have a food processor.
- Heat the vegetable oil in a large skillet or wok over medium-high heat. Once the oil is shimmering, add the minced garlic and ginger, stirring quickly to avoid burning, and sauté for about 30 seconds until fragrant.
- Add the diced bell pepper, julienned carrots, and snap peas to the skillet. Stir-fry the vegetables for about 3-4 minutes, or until they begin to soften but still retain some crunch.
- Incorporate the riced cauliflower into the skillet, mixing it well with the sautéed vegetables. Stir-fry for an additional 5-7 minutes, allowing the cauliflower to cook through and absorb the flavors of the dish.
- Pour in the soy sauce or tamari and sesame oil, stirring to coat the cauliflower rice and vegetables evenly. Continue to cook for another 2-3 minutes, tasting and adjusting the seasoning with salt and pepper as needed.
- Remove the skillet from heat and fold in the sliced green onions. Serve the stir-fry hot, garnished with additional green onions or sesame seeds if desired.
Extra Tips: For added protein, feel free to include cooked chicken, shrimp, or tofu during step 4. You can also experiment with different vegetables, such as broccoli, zucchini, or mushrooms, based on your preferences or what you have on hand.
If you want a bit of heat, consider adding red pepper flakes or a splash of sriracha. This stir-fry makes excellent leftovers and can be easily reheated for a quick meal throughout the week. Enjoy your healthy and delicious cauliflower rice stir-fry!
Spaghetti With Marinara Sauce
Title: Spaghetti With Marinara Sauce
Prep Time: 10 minutes
Cook Time: 20 minutes
Number of Servings: 4
Required Equipment List: Large pot, saucepan, wooden spoon, colander, serving bowl
Cuisine Type: Italian
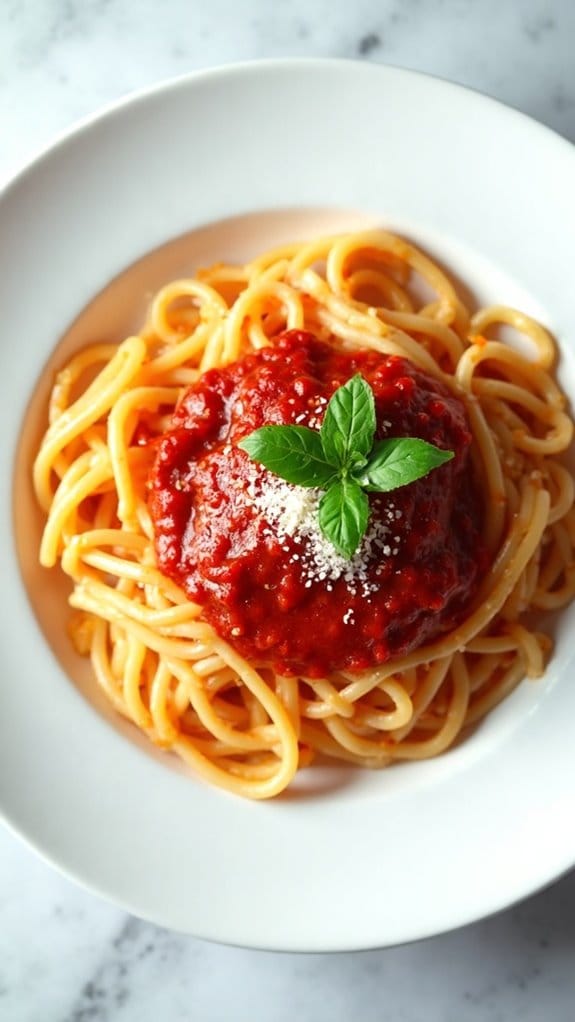
Spaghetti with marinara sauce is a classic dish that embodies the essence of Italian cooking with its simple ingredients and rich flavors. This recipe features al dente spaghetti tossed in a vibrant homemade marinara sauce made from fresh tomatoes, garlic, and herbs. It’s not only quick to prepare but also a delightful option for a family dinner or a cozy gathering with friends.
The fragrant aroma of garlic sautéing in olive oil will fill your kitchen, setting the stage for a comforting meal. The beauty of this dish lies in its versatility; you can add your favorite vegetables or protein to the marinara sauce or enjoy it as is for a lighter option.
Whether you’re a seasoned cook or a beginner, this spaghetti with marinara is a dish that everyone can master. Pair it with a side salad or some crusty bread, and you’ll have a satisfying meal that’s sure to please any palate.
Ingredients:
- 12 ounces spaghetti
- 2 tablespoons olive oil
- 4 cloves garlic, minced
- 1 can (28 ounces) crushed tomatoes
- 1 teaspoon dried oregano
- 1 teaspoon dried basil
- Salt and pepper to taste
- Fresh basil leaves for garnish (optional)
- Grated dairy-free cheese (optional)
Instructions:
- Begin by bringing a large pot of salted water to a boil. Once boiling, add the spaghetti and cook according to package instructions until al dente. This usually takes about 8-10 minutes. Stir occasionally to prevent sticking.
- While the spaghetti is cooking, heat the olive oil in a saucepan over medium heat. Add the minced garlic and sauté for about 1-2 minutes, until fragrant but not browned, as burnt garlic can become bitter.
- Add the crushed tomatoes to the saucepan along with the dried oregano and dried basil. Stir well to combine all the ingredients and bring the sauce to a gentle simmer. Allow it to cook for about 10 minutes, stirring occasionally, so the flavors meld together.
- Once the spaghetti is cooked, reserve about 1 cup of the pasta cooking water and then drain the spaghetti in a colander. Return the drained spaghetti to the pot and add the marinara sauce. Toss everything together, adding a splash of reserved pasta water if the sauce is too thick.
- Season the pasta with salt and pepper to taste. Serve immediately, garnished with fresh basil leaves and a sprinkle of grated dairy-free cheese, if desired.
Extra Tips: To elevate the flavor of your marinara sauce, consider adding a pinch of red pepper flakes for a bit of heat or a splash of red wine for depth. If you have extra vegetables on hand, such as bell peppers or zucchini, you can sauté them with the garlic for added nutrition and flavor.
For a heartier meal, add cooked lentils or plant-based protein to the sauce. Enjoy your delicious spaghetti with marinara sauce!
Lemon Garlic Shrimp
Title: Lemon Garlic Shrimp
Prep Time: 10 minutes
Cook Time: 10 minutes
Number of Servings: 4
Required Equipment List: Large skillet, measuring spoons, spatula, serving dish
Cuisine Type: Mediterranean
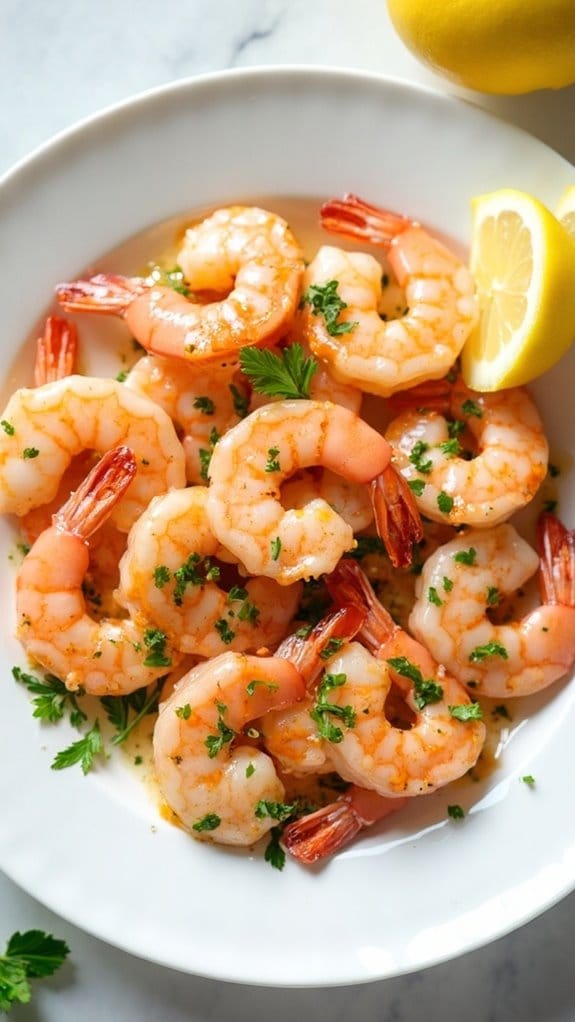
Lemon Garlic Shrimp is a quick and flavorful dish that brings the vibrant tastes of the Mediterranean right to your dinner table. This recipe features succulent shrimp sautéed in a zesty lemon and garlic sauce, delivering a burst of flavor in every bite. Perfect for busy weeknights, this dish comes together in under 20 minutes and can be served over rice, pasta, or alongside a crisp salad for a light and satisfying meal.
The combination of fresh lemon juice, garlic, and a hint of red pepper flakes creates a delightful sauce that elevates the shrimp’s natural sweetness. Not only is this dish incredibly delicious, but it’s also healthy and dairy-free, making it suitable for various dietary preferences. With its bright flavors and simple preparation, Lemon Garlic Shrimp is sure to become a favorite in your household.
Ingredients:
- 1 pound large shrimp, peeled and deveined
- 4 cloves garlic, minced
- 1/4 cup fresh lemon juice
- Zest of 1 lemon
- 1/4 teaspoon red pepper flakes (optional)
- 2 tablespoons olive oil
- Salt and pepper to taste
- Fresh parsley, chopped (for garnish)
Instructions:
- Heat the olive oil in a large skillet over medium heat. Once hot, add the minced garlic and sauté for about 1 minute until fragrant, being careful not to let it brown.
- Add the shrimp to the skillet, season with salt, pepper, and red pepper flakes (if using). Cook for about 2-3 minutes on one side until they turn pink and opaque.
- Flip the shrimp and pour in the fresh lemon juice and lemon zest. Continue to cook for another 2-3 minutes until the shrimp are fully cooked through and coated in the sauce.
- Remove the skillet from heat and garnish with chopped fresh parsley before serving. The vibrant colors and fragrant aroma will make this dish irresistible.
- Serve the Lemon Garlic Shrimp immediately over a bed of rice, pasta, or alongside a fresh green salad for a complete meal.
Extra Tips: For a deeper flavor, consider marinating the shrimp in the lemon juice, garlic, and olive oil for about 30 minutes before cooking. This will infuse the shrimp with more flavor and make them even juicier.
If you enjoy a bit of crunch, you can add some sliced bell peppers or asparagus to the skillet during the last few minutes of cooking. This dish pairs well with a crisp white wine or a revitalizing lemonade for a perfect meal.
Stuffed Bell Peppers
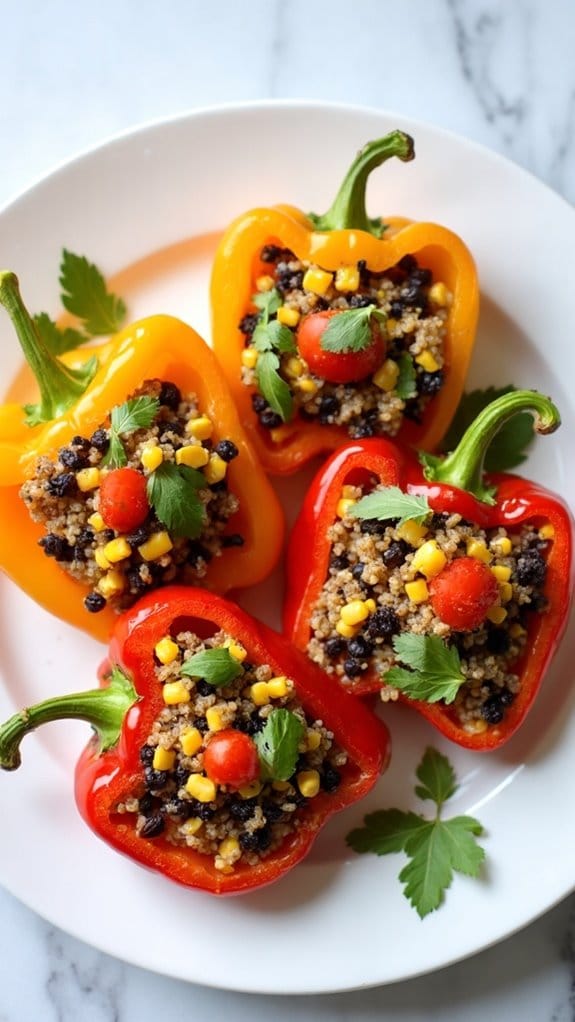
Title: Dairy-Free Stuffed Bell Peppers
Prep Time: 15 minutes
Cook Time: 30 minutes
Number of Servings: 4
Required Equipment List: Baking dish, mixing bowl, oven, knife, cutting board
Cuisine Type: American
Dairy-Free Stuffed Bell Peppers are a colorful and nutritious dish that brings together the vibrant flavors of fresh vegetables and wholesome grains. This recipe features bell peppers filled with a savory mixture of quinoa, black beans, corn, and spices, all baked to perfection. Not only are they satisfying and filling, but they also provide a great opportunity to incorporate a variety of vegetables into your meal, making them perfect for a healthy weeknight dinner or a fun gathering with friends.
The beauty of stuffed bell peppers lies in their versatility. You can easily customize the filling based on your preferences, adding ingredients like diced tomatoes, onions, or even different types of beans. Furthermore, these peppers can be made ahead of time and stored in the refrigerator, making them a convenient option for meal prep.
Once baked, they become tender and flavorful, offering a delightful bite that’s both hearty and packed with nutrition.
Ingredients:
- 4 large bell peppers (any color)
- 1 cup cooked quinoa
- 1 can (15 ounces) black beans, rinsed and drained
- 1 cup corn (fresh, frozen, or canned)
- 1 teaspoon cumin
- 1 teaspoon chili powder
- Salt and pepper to taste
- 1 cup diced tomatoes (canned or fresh)
- 1 tablespoon olive oil
- Fresh cilantro for garnish (optional)
Instructions:
- Preheat your oven to 375°F (190°C) and prepare a baking dish by lightly greasing it with oil. Wash the bell peppers, cut the tops off, and remove the seeds and membranes to create space for the filling.
- In a mixing bowl, combine the cooked quinoa, black beans, corn, diced tomatoes, cumin, chili powder, salt, and pepper. Mix well until all ingredients are evenly incorporated, and the mixture is well-seasoned.
- Spoon the quinoa mixture into each bell pepper, packing it down gently to make sure they’re filled well. Place the stuffed peppers upright in the prepared baking dish.
- Drizzle the tops of the stuffed peppers with olive oil to help them roast and enhance their flavor. Cover the baking dish with aluminum foil to retain moisture while baking.
- Bake the stuffed peppers in the preheated oven for 25 minutes. After 25 minutes, remove the foil and bake for an additional 5-10 minutes, until the peppers are tender and slightly charred on top.
- Once done, remove the stuffed peppers from the oven and let them cool for a few minutes. Garnish with fresh cilantro before serving for a burst of freshness.
Extra Tips: For added flavor, consider topping the stuffed peppers with a dairy-free cheese alternative before the final baking stage. Additionally, feel free to mix and match different grains like brown rice or farro in place of quinoa for a different texture.
These stuffed peppers can also be frozen after baking, making them a great option for quick meals on busy days. Enjoy your delicious and healthy stuffed bell peppers!
Vegan Buddha Bowl
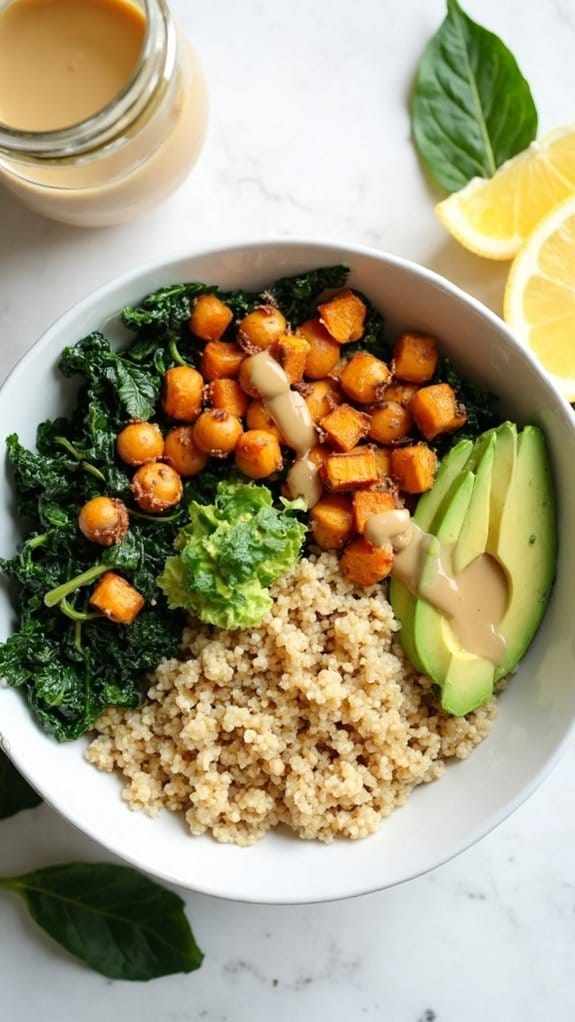
Title: Vegan Buddha Bowl
Prep Time: 15 minutes
Cook Time: 25 minutes
Number of Servings: 4
Required Equipment List: Medium saucepan, baking sheet, mixing bowl, knife, cutting board
Cuisine Type: Vegan
The Vegan Buddha Bowl is a vibrant and nutritious dish that brings together a medley of colorful vegetables, grains, and plant-based proteins, all topped with a creamy dressing. This bowl isn’t only visually appealing but also packed with flavor and health benefits. Perfect for meal prep or a quick weeknight dinner, the Buddha Bowl is versatile and can be customized based on seasonal ingredients or personal preferences.
Each component of the bowl is cooked separately, allowing the flavors to shine while also providing a satisfying variety of textures. The combination of quinoa, roasted sweet potatoes, sautéed greens, and chickpeas creates a wholesome base, while the avocado and tahini dressing add a rich creaminess. This dish is an excellent way to incorporate more plant-based foods into your diet while enjoying a filling and delicious meal.
Ingredients:
- 1 cup quinoa
- 2 cups vegetable broth
- 2 medium sweet potatoes, diced
- 1 can chickpeas, drained and rinsed
- 2 cups kale or spinach, chopped
- 1 avocado, sliced
- 2 tablespoons olive oil
- Salt and pepper to taste
- 1 teaspoon paprika
- 4 tablespoons tahini
- Juice of 1 lemon
- Water (as needed for dressing)
Instructions:
- Preheat your oven to 400°F (200°C). Line a baking sheet with parchment paper. Spread the diced sweet potatoes and chickpeas on the sheet, drizzle with olive oil, and sprinkle with paprika, salt, and pepper. Toss to coat evenly and roast in the oven for 20-25 minutes, or until the sweet potatoes are tender and slightly caramelized.
- While the sweet potatoes and chickpeas are roasting, rinse the quinoa under cold water. In a medium saucepan, combine the quinoa and vegetable broth. Bring to a boil over medium-high heat, then reduce to low, cover, and let it simmer for about 15 minutes, or until the quinoa is fluffy and the liquid has been absorbed. Remove from heat and let it sit, covered, for an additional 5 minutes.
- In a large skillet, heat a tablespoon of olive oil over medium heat. Add the chopped kale or spinach and sauté for 3-4 minutes, until wilted. Season with salt and pepper to taste. Remove from heat and set aside.
- To prepare the tahini dressing, combine the tahini, lemon juice, and a splash of water in a mixing bowl. Whisk until smooth, adding more water as needed to reach your desired consistency. Season with salt to taste.
- To assemble each Buddha Bowl, start with a base of quinoa, then layer in the roasted sweet potatoes, chickpeas, and sautéed greens. Top with sliced avocado and drizzle with tahini dressing. Garnish with additional lemon wedges if desired.
Extra Tips: Feel free to customize your Buddha Bowl by adding other ingredients such as roasted vegetables, seeds, or nuts for added crunch. You can also swap the quinoa for brown rice or farro, depending on your preference. This bowl is perfect for meal prepping; simply store the components separately in the fridge and assemble when ready to eat. Enjoy your nutritious and delicious creation!
BBQ Pulled Jackfruit Sandwiches
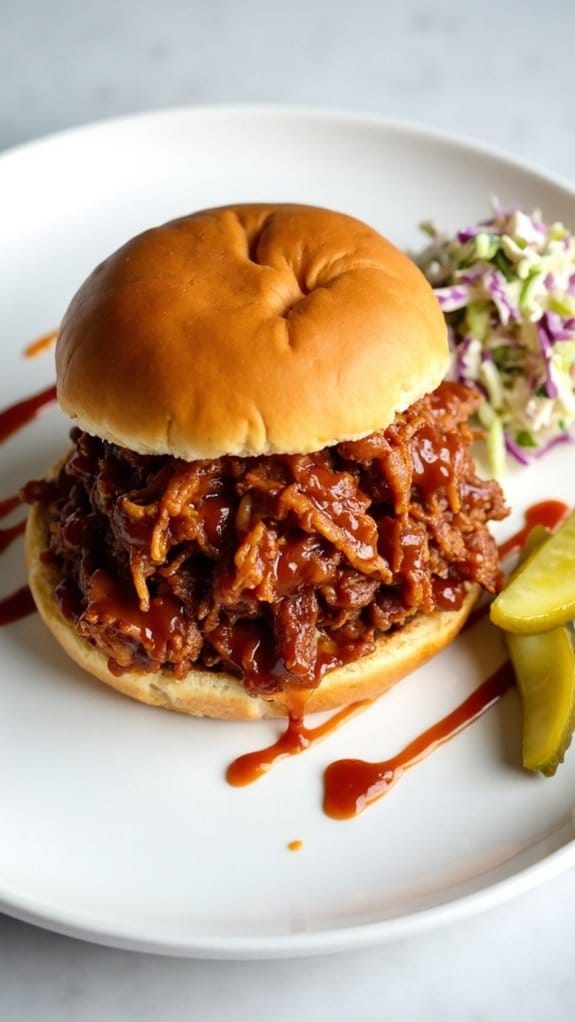
Title: BBQ Pulled Jackfruit Sandwiches
Prep Time: 15 minutes
Cook Time: 30 minutes
Number of Servings: 4
Required Equipment List: Large skillet, mixing spoon, serving plates, sandwich buns
Cuisine Type: American
BBQ Pulled Jackfruit Sandwiches are a fantastic plant-based alternative to traditional pulled pork sandwiches, offering a deliciously smoky and savory flavor. Jackfruit is a versatile fruit that, when cooked and shredded, mimics the texture of pulled meat, making it an ideal filling for sandwiches.
This recipe combines jackfruit with a homemade or store-bought BBQ sauce, creating a hearty meal that can be enjoyed by everyone, regardless of dietary preferences. These sandwiches are perfect for summer barbecues, family gatherings, or a cozy weeknight dinner.
The jackfruit absorbs the flavors of the BBQ sauce beautifully, and when piled high on a soft sandwich bun, it creates a satisfying and flavorful dish. You can serve these sandwiches with coleslaw or pickles on the side for added crunch and flavor.
Ingredients:
- 2 cans young green jackfruit in water or brine, drained and rinsed
- 1 tablespoon olive oil
- 1 small onion, diced
- 2 cloves garlic, minced
- 1 cup BBQ sauce (store-bought or homemade)
- Salt and pepper to taste
- 4 sandwich buns
- Coleslaw (optional, for serving)
- Pickles (optional, for serving)
Instructions:
- Begin by preparing the jackfruit. Drain the canned jackfruit and rinse it under cold water. Remove the core from each piece and shred the jackfruit with your fingers or a fork, creating a pulled texture.
- In a large skillet, heat the olive oil over medium heat. Add the diced onion and sauté for about 5 minutes until softened. Then, add the minced garlic and cook for an additional 1-2 minutes until fragrant.
- Add the shredded jackfruit to the skillet, stirring to combine with the onion and garlic. Season with salt and pepper to taste. Cook for about 5 minutes, allowing it to heat through and begin to brown slightly.
- Pour in the BBQ sauce, stirring well to coat the jackfruit evenly. Reduce the heat to low and let it simmer for about 15-20 minutes, stirring occasionally. This will allow the jackfruit to absorb the flavors of the sauce.
- While the jackfruit is simmering, you can toast the sandwich buns if desired. Once the jackfruit is tender and well-coated in BBQ sauce, remove it from heat.
- To assemble the sandwiches, pile the BBQ pulled jackfruit onto the bottom half of each bun. Top with coleslaw and pickles if using and place the top half of the bun over the filling. Serve immediately.
Extra Tips: When selecting jackfruit, make sure to choose young green jackfruit in water or brine, as ripe jackfruit is too sweet and not suitable for savory dishes.
If you’re looking to enhance the flavor, consider adding some smoked paprika or liquid smoke to the jackfruit while cooking. This will deepen the BBQ flavor and give it that authentic smoky taste. Enjoy your delicious and satisfying pulled jackfruit sandwiches!
Chickpea Salad Sandwich
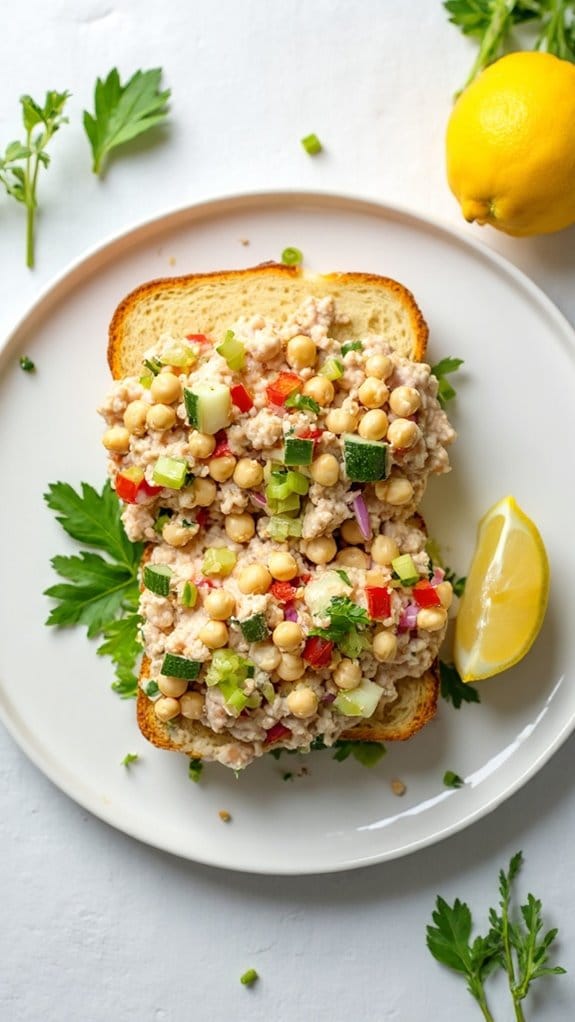
Title: Chickpea Salad Sandwich
Prep Time: 10 minutes
Cook Time: 0 minutes
Number of Servings: 4
Required Equipment List: Mixing bowl, spoon, sandwich bread
Cuisine Type: Mediterranean
The Chickpea Salad Sandwich is a delicious and healthful option for lunch or a light dinner. Packed with protein-rich chickpeas, crunchy vegetables, and a tangy dressing, this sandwich isn’t only filling but also bursting with flavor. The creamy texture of the mashed chickpeas combined with the crispness of the diced vegetables makes for a satisfying bite that everyone will love.
Plus, it’s easy to whip up in no time, making it a great choice for busy days. This versatile salad can be served as a sandwich, on a bed of greens, or even as a filling for lettuce wraps. You can customize the ingredients according to your taste, adding in your favorite veggies or spices.
It’s a perfect dish for meal prep, as it keeps well in the fridge and can be enjoyed throughout the week. Whether you’re vegan, dairy-free, or simply looking for a nutritious meal, this Chickpea Salad Sandwich is sure to become a staple in your kitchen.
Ingredients:
- 1 can (15 oz) chickpeas, drained and rinsed
- 1/4 cup red onion, finely chopped
- 1/2 cup cucumber, diced
- 1/2 cup bell pepper, diced
- 1/4 cup celery, diced
- 1/4 cup vegan mayonnaise
- 1 tablespoon Dijon mustard
- 1 tablespoon lemon juice
- Salt and pepper to taste
- Sandwich bread or wraps
Instructions:
- In a mixing bowl, add the drained and rinsed chickpeas. Using a fork or a potato masher, mash the chickpeas until they’re mostly broken down but still have some texture. This will create a creamy base for your salad.
- Add the finely chopped red onion, diced cucumber, diced bell pepper, and diced celery to the mashed chickpeas. These vegetables will add crunch and freshness to the salad.
- In a separate small bowl, mix together the vegan mayonnaise, Dijon mustard, lemon juice, salt, and pepper. Stir until the ingredients are well combined. This dressing will enhance the flavors of the salad.
- Pour the dressing over the chickpea and vegetable mixture. Gently fold everything together until all the ingredients are evenly coated with the dressing. Be careful not to over-mix to keep some texture in the salad.
- Serve the chickpea salad on your choice of sandwich bread or wraps. You can also enjoy it on a bed of greens for a lighter option.
Extra Tips: To elevate the flavor of your Chickpea Salad Sandwich, consider adding herbs like dill or parsley for freshness. You can also throw in some diced avocado for creaminess or a handful of spinach for an extra nutrient boost.
This salad can be made ahead of time and stored in the refrigerator for up to three days, making it a perfect option for meal prep. Enjoy your healthy and tasty creation!
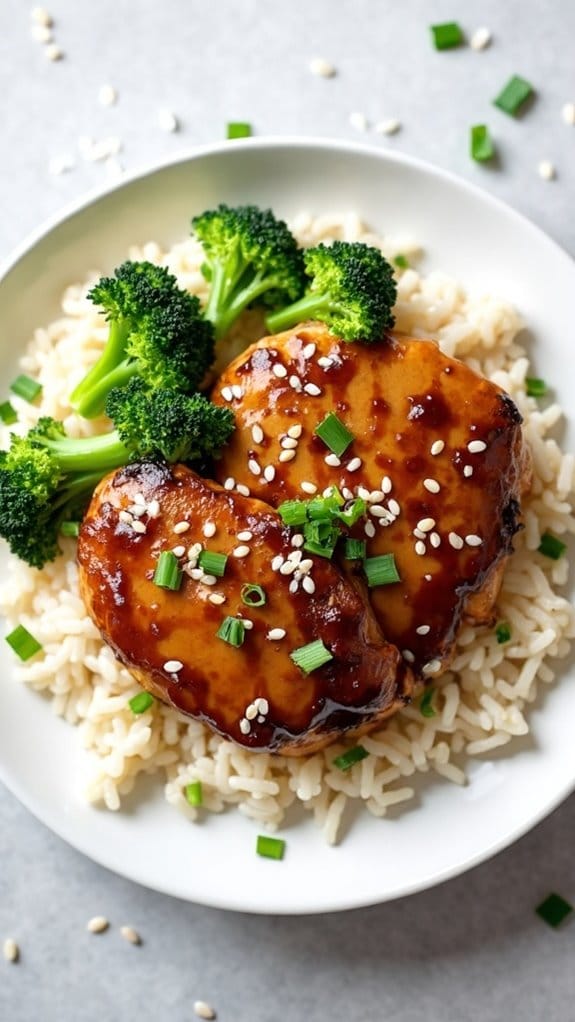
Teriyaki Chicken and Rice
Title: Teriyaki Chicken and Rice
Prep Time: 15 minutes
Cook Time: 30 minutes
Number of Servings: 4
Required Equipment List: Skillet, measuring cups, measuring spoons, rice cooker or pot, cutting board, knife
Cuisine Type: Asian-inspired
Teriyaki Chicken and Rice is a delicious and satisfying dish that combines tender chicken marinated in a sweet and savory teriyaki sauce, served over a bed of fluffy rice. This dish isn’t only easy to prepare but also offers a fantastic balance of flavors that can please the whole family.
The chicken is cooked to perfection, absorbing the delicious teriyaki flavors, while the rice serves as a perfect base to soak up any extra sauce. This recipe is ideal for busy weeknights or weekend gatherings, as it can be made in about 30 minutes.
You can customize the dish by adding your favorite vegetables, such as bell peppers or broccoli, for an extra burst of color and nutrition. With simple ingredients and straightforward steps, you’ll have a scrumptious meal ready in no time, making it a go-to option for any occasion.
Ingredients:
- 1 lb boneless, skinless chicken thighs
- 1/4 cup teriyaki sauce
- 1 tablespoon olive oil
- 1 cup jasmine rice
- 2 cups water
- 1 cup broccoli florets (optional)
- 1 tablespoon sesame seeds (for garnish)
- Green onions, chopped (for garnish)
Instructions:
- Begin by marinating the chicken thighs in teriyaki sauce for at least 15 minutes. If you have more time, consider marinating them longer in the refrigerator for deeper flavor.
- While the chicken is marinating, rinse the jasmine rice under cold water until the water runs clear. This step will help remove excess starch and guarantee fluffy rice.
- In a rice cooker or pot, combine the rinsed rice with 2 cups of water. Cook according to the rice cooker instructions or bring to a boil over medium-high heat, then reduce heat to low, cover, and simmer for about 15 minutes.
- In a skillet, heat the olive oil over medium-high heat. Once hot, add the marinated chicken thighs and cook for about 6-7 minutes on each side, or until fully cooked and golden brown. If using broccoli, add it to the skillet during the last few minutes of cooking to steam it until tender.
- Once the chicken is cooked, remove it from the skillet and let it rest for a few minutes before slicing it into bite-sized pieces.
- Fluff the cooked rice with a fork and divide it among four serving plates. Top each plate with sliced chicken and drizzle any remaining teriyaki sauce from the skillet over the chicken and rice. Garnish with sesame seeds and chopped green onions.
Extra Tips: For an extra kick, you can add a splash of sriracha or chili flakes to the teriyaki sauce while marinating the chicken. Feel free to swap out jasmine rice for brown rice or cauliflower rice for a healthier option.
This dish pairs well with a side of steamed edamame or a simple cucumber salad for an invigorating contrast. Enjoy your homemade teriyaki chicken and rice!
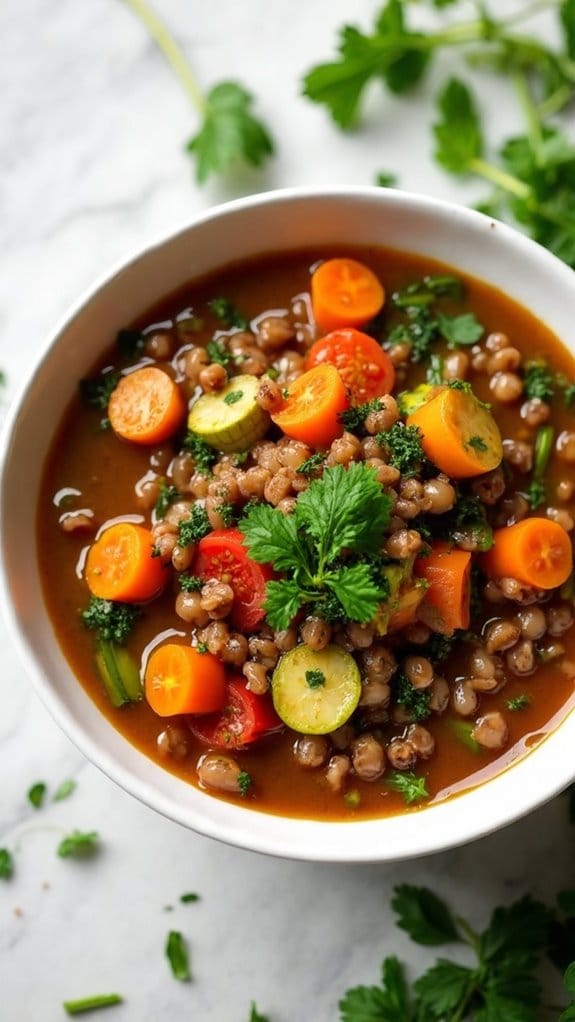
Lentil and Vegetable Stew
Title: Lentil and Vegetable Stew
Prep Time: 15 minutes
Cook Time: 40 minutes
Number of Servings: 6
Required Equipment List: Large pot, wooden spoon, knife, cutting board, measuring cups, measuring spoons
Cuisine Type: Vegan
This hearty Lentil and Vegetable Stew is a comforting and nutritious dish that’s perfect for chilly evenings. Packed with protein-rich lentils and an array of colorful vegetables, this stew isn’t only delicious but also incredibly filling. The combination of spices and herbs adds depth to the flavor, making each spoonful a delight.
It’s an ideal plant-based meal that can be enjoyed on its own or served alongside crusty bread. Making this stew is a breeze, as it requires minimal preparation and can be easily customized to include your favorite vegetables. It’s also a fantastic way to use up any leftover produce you have on hand.
In addition, this stew is great for meal prepping, as the flavors continue to develop over time, making it perfect for lunchboxes or quick dinners throughout the week.
Ingredients:
- 1 cup dried lentils (green or brown)
- 1 tablespoon olive oil
- 1 onion, diced
- 2 carrots, diced
- 2 celery stalks, diced
- 3 cloves garlic, minced
- 1 bell pepper, diced
- 1 zucchini, diced
- 1 can (14 oz) diced tomatoes
- 4 cups vegetable broth
- 1 teaspoon dried thyme
- 1 teaspoon ground cumin
- 1/2 teaspoon smoked paprika
- Salt and pepper to taste
- Fresh parsley, chopped (for garnish)
Instructions:
- Rinse the lentils under cold water in a fine-mesh strainer until the water runs clear. This helps to remove any dirt or impurities and guarantees they cook evenly.
- In a large pot, heat the olive oil over medium heat. Add the diced onion, carrots, and celery, and sauté for about 5 minutes until the vegetables are softened and the onion becomes translucent.
- Stir in the minced garlic and diced bell pepper, cooking for an additional 2-3 minutes until fragrant. Be careful not to burn the garlic, as it can become bitter.
- Add the zucchini, rinsed lentils, diced tomatoes (with their juice), vegetable broth, thyme, cumin, and smoked paprika to the pot. Stir well to combine all the ingredients.
- Bring the mixture to a boil, then reduce the heat to low and cover the pot. Let the stew simmer for about 30 minutes, or until the lentils are tender and the vegetables are cooked through.
- Taste the stew and season with salt and pepper as needed. If the stew is too thick, you can add more vegetable broth or water to reach your desired consistency before serving.
- Ladle the stew into bowls and garnish with freshly chopped parsley for a burst of color and freshness.
Extra Tips: For added richness, consider incorporating a bay leaf during cooking—just remember to remove it before serving. Feel free to experiment with different spices or add other vegetables such as spinach or kale for extra nutrition.
This stew can be stored in the refrigerator for up to a week, and it also freezes well, making it a great option for batch cooking. Enjoy the warmth and flavor of this delicious lentil and vegetable stew!
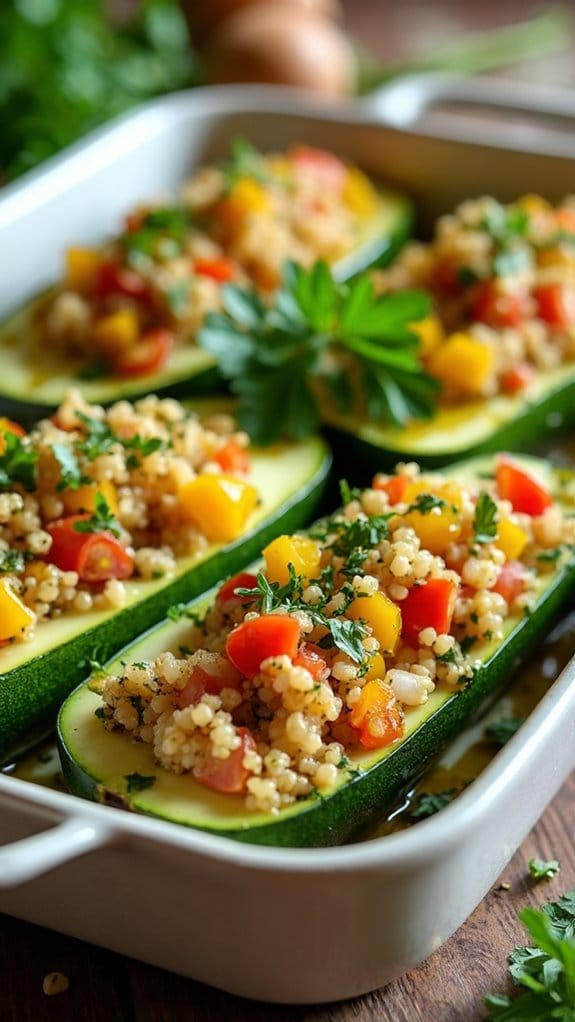
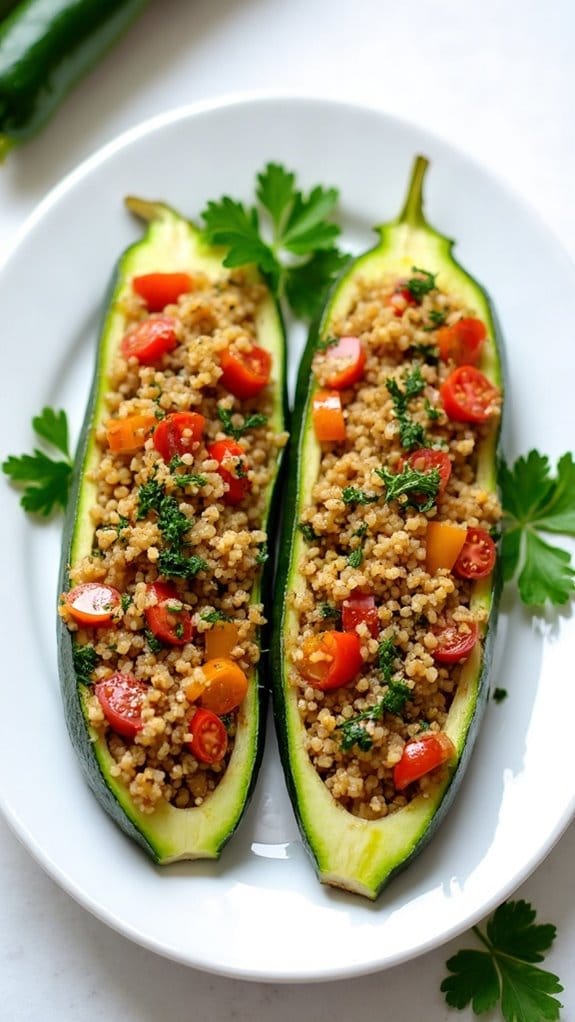
Quinoa Stuffed Zucchini
Title: Quinoa Stuffed Zucchini
Prep Time: 15 minutes
Cook Time: 30 minutes
Number of Servings: 4
Required Equipment List: Baking dish, oven, mixing bowl, knife, spoon
Cuisine Type: Mediterranean
Quinoa Stuffed Zucchini is a healthy and delicious dish that showcases the wonderful flavors of Mediterranean cuisine. This recipe features tender zucchinis hollowed out and filled with a savory mixture of quinoa, vegetables, and spices, creating a satisfying meal that’s both nutritious and filling.
The combination of textures and flavors makes it an excellent option for a hearty dinner or a light lunch, perfect for anyone looking for a dairy-free meal. Not only is this dish visually appealing, but it also provides a great way to incorporate more vegetables into your diet.
The versatility of quinoa allows for endless variations on the stuffing, such as adding beans for protein or different herbs for flavor. Serve these stuffed zucchinis warm and enjoy the vibrant taste of fresh ingredients in every bite.
Ingredients:
- 4 medium zucchinis
- 1 cup cooked quinoa
- 1 cup diced tomatoes
- 1 small onion, diced
- 1 bell pepper, diced
- 2 cloves garlic, minced
- 1 teaspoon dried oregano
- 1 teaspoon dried basil
- Salt and pepper to taste
- 2 tablespoons olive oil
- Fresh parsley for garnish (optional)
Instructions:
- Preheat your oven to 375°F (190°C). While the oven is heating up, prepare the zucchinis by slicing them in half lengthwise and scooping out the seeds to create boats for the filling. Place the hollowed zucchinis cut-side up in a baking dish.
- In a mixing bowl, combine the cooked quinoa, diced tomatoes, onion, bell pepper, and minced garlic. Add the dried oregano, dried basil, salt, pepper, and olive oil, mixing well until all ingredients are fully incorporated.
- Spoon the quinoa mixture evenly into each zucchini half, pressing it down gently to pack it in. Confirm that each zucchini is generously filled with the stuffing.
- Cover the baking dish with aluminum foil and bake in the preheated oven for 20 minutes. This steaming process will help the zucchinis soften and the flavors meld together beautifully.
- After 20 minutes, remove the foil and bake for an additional 10 minutes, allowing the tops to brown slightly. Once done, remove from the oven and let cool for a few minutes before garnishing with fresh parsley, if desired.
Extra Tips: To add a little extra flavor, consider mixing in some chopped olives or feta cheese (if dairy isn’t a concern) into the quinoa filling. You can also experiment with different vegetables in the stuffing, such as mushrooms or spinach, to suit your taste preferences.
Leftover stuffed zucchinis can be stored in the refrigerator and reheated for a quick and easy meal. Enjoy your healthy and delicious creation!
Conclusion
Now that you’ve got these 19 delicious dairy-free dinner recipes in your back pocket, it’s time to roll up your sleeves and get cooking! Whether you’re in the mood for a creamy coconut curry or a fresh quinoa salad, there’s something here for everyone. So, why not spice up your weeknight meals? After all, variety is the spice of life, and with these recipes, you’ll never hear “What’s for dinner?” in a dull tone again!